Introduction
Traveling to the Galápagos Islands without a cruise or package tour is absolutely possible, and in this guide, I’ll show you exactly how to do it step-by-step based on my trip in November 2025.
This guide will walk you through how to get to the Galápagos, what documents you need, how inter-island ferries work, how to island hop without a cruise, how to book day tours once you arrive, and what realistic costs look like.
I had always wanted to visit the Galápagos, but I kept putting it off because I assumed cruises were the only option and they were outside my budget.
But I met a woman during my travels who lived in the Galápagos. She told me that the islands could actually be explored independently—and on a much more reasonable budget than I had expected.
So I booked a flight, started figuring out the logistics, and my friend walked me through how everything works, which I’m now sharing here.
The Galápagos is a bit different from most destinations because of strict conservation rules and protected wildlife areas, but independent travel is still very doable.
This guide breaks everything down so you can visit the Galápagos without a cruise and plan the trip on your own terms.
What You Need to Visit the Galápagos
- A flight to either San Cristóbal Airport or Seymour Airport
- Accommodations booked on one of the four inhabited islands (San Cristóbal, Santa Cruz, Isabela, or Floreana)
- A Galápagos Transit Control Card (TCT): $20 USD
- Galápagos National Park entry fee: $200 USD cash for international adult visitors
Flying to the Galápagos Islands
There are two airports in the Galápagos:
- San Cristóbal Airport
- Seymour Airport on Baltra Island. Baltra Island itself is uninhabited, so if you fly here, you’ll need to transfer to Santa Cruz Island. I explain how to do that below.
Flights to the Galápagos depart from mainland Ecuador only via:
- Quito
- Guayaquil
No matter where you’re flying from internationally, you’ll need to connect through one of these cities to reach the Galápagos.
Flights from mainland Ecuador to the Galápagos typically depart in the morning. If your international flight arrives later in the day, you’ll need to spend a night in either Quito or Guayaquil before continuing to the islands.
That’s what happened to me. My flight arrived in Guayaquil after the last Galápagos departures had already left for the day, so I stayed overnight and flew to the Galápagos the following morning.
Tip: If you don’t like the connection options on a single itinerary, you can book two separate round-trip tickets. That’s what I did, and it gave me more flexibility with flight times.
- I booked a round-trip flight from my home airport to Guayaquil
- I booked a separate round-trip flight from Guayaquil to Seymour Airport.
For my return flight home, I booked a morning arrival into Guayaquil and an evening departure home. That gave me plenty of buffer time in case of delays. If you’re booking separate tickets, remember that the airlines aren’t responsible for missed connections, so it’s worth building in extra time between flights (I gave myself a 5-hour layover).
Booking one continuous itinerary is usually the simplest option, but if you don’t like the connection times or the total travel time, it may be worth booking separate round-trip tickets. You can check flight options here.
If you plan on island hopping, you can also fly into one island and depart from another. For example, you could fly into Seymour airport and depart from San Cristóbal airport.
My Overnight Stay in Guayaquil
Because I couldn’t coordinate a flight from my home airport with the morning departures to the Galápagos, I spent a night in Guayaquil before continuing on to the islands the next day.
I was a little nervous about staying in Guayaquil because of the safety concerns I’d heard about, so I booked a hotel that offered airport shuttle service. A driver picked me up directly from the airport and dropped me off the next morning, which made the overnight stay easy and stress-free.
Another option is to stay in Quito and spend a day or two exploring the city before heading to the Galápagos. I chose to connect through Guayaquil because it’s closer to the islands and my main priority was getting to the Galápagos as quickly as possible.
Galápagos Transit Control Card (TCT)
Before traveling to the Galápagos, all visitors are required to obtain a Transit Control Card (TCT). The TCT is used to monitor tourism and help protect the islands’ fragile ecosystem.
You can register for it online through the official TCT portal before your trip. During the registration process, you’ll need:
- Your passport
- Flight details
- Accommodation information
You can either pay the $20 USD fee online or in person at the airport in Quito or Guayaquil before your flight to the Galápagos.
At the time I traveled, the online payment system wasn’t working for me, so I paid the fee in cash at Guayaquil Airport instead.
Once your registration is complete, you’ll receive an email with an attachment containing your Transit Control Card (TCT) and a QR code. Save both on your phone or as printouts—you’ll need to show them at the airport before boarding your flight to the Galápagos.
At the Airport in Quito or Guayaquil
I recommend arriving at least two hours before your flight to allow enough time for the TCT verification process, biosecurity screening, regular airport security, and finding your gate.
The process will look like this:
Check-in for flight → TCT verification → Biosecurity inspection → Drop off checked luggage (skip if you have no checked bags) → Regular airport security → Head to gate
When you arrive at the airport in Quito or Guayaquil, check in for your flight and get your boarding pass if you haven’t already done so online.
Note: if you are checking luggage, there is a biosecurity inspection that takes place before you drop your bags off at the airline counter. But before you go through the biosecurity inspection, you’ll need your boarding pass.
With your boarding pass in hand, head to the Galápagos Government Council desk. This is where officials verify your TCT documents before allowing you to proceed to the biosecurity screening area.
The desk was very easy to find. As soon as I entered the departure hall at Guayaquil airport, I saw a large sign for Galápagos Transit Control.
At the desk, I had to show:
- My passport
- My boarding pass
- My TCT and QR code
Since I hadn’t paid online, I paid the $20 USD fee there in cash.
Once everything was approved, I continued to the biosecurity screening area.
Biosecurity Screening
At either Quito or Guayaquil airport, travelers flying to the Galápagos must complete an additional biosecurity screening process before going through regular airport security and heading to their gate.
These measures are designed to prevent invasive species from entering the islands and damaging the Galápagos’ fragile ecosystem. You cannot bring coffee, fruits, vegetables, seeds, plants, and other agricultural products.
You need to complete a mandatory declaration form listing the items you’re bringing into the Galápagos and show it to officials. You can complete this form online up to 72 hours before your flight.
I actually didn’t know about this form until I was at the biosecurity area, so I was given a QR code to scan and filled it out on my phone right there. It didn’t take long, but I was a bit flustered. It’s easier to complete it beforehand, but you can also do it at the airport using a QR code if needed. Either way, be prepared to show the completed form to officials. I was asked to present mine both at the biosecurity inspection area before departure and again upon arrival in the Galápagos.
After filling out the declaration form and having it verified, I placed my luggage on a conveyor belt for X-ray screening.
I traveled with only a carry-on and a personal item, so after my bags were cleared, I collected them, continued through regular airport security, and proceeded to my gate.
If you’re checking luggage, your bags must first pass through biosecurity inspection. Once approved, inspectors will mark them as inspected (sometimes the bags are sealed). You can then bring your bags to the airline counter to check them in.
Arriving in the Galápagos
When you arrive in the Galápagos, there is a desk inside the airport where you pay the National Park entrance fee as soon as you disembark from the plane. This fee helps fund conservation efforts across the islands.
The fee is currently $200 USD for international adult visitors and $100 USD for children under 12. Payment must be made in cash. Ecuador uses the U.S. dollar as its official currency.
Bring enough cash with you before boarding your flight because you need to pay this fee as soon as you get off the plane, and you won’t have ATM access.
After paying the fee and clearing the final checkpoint, you walk out of the airport and — just like that — you’re in the Galápagos.

If you fly into Seymour Airport on Baltra Island, the next step is getting to Puerto Ayora on Santa Cruz Island, which I describe below. Before my trip, this part sounded extremely confusing, but it turned out to be surprisingly easy and very straightforward.
How to Get from Seymour Airport to Puerto Ayora
Getting from Seymour Airport to Puerto Ayora (the main town on Santa Cruz Island) is very straightforward and follows this route:
Airport shuttle bus → Ferry → Bus or taxi → Puerto Ayora
You don’t need to book anything in advance, and the transportation system is coordinated around arriving flights.
Step 1: Airport Shuttle Bus ($5 USD)
Right outside the airport terminal, you’ll find the shuttle bus ticket stand. Buy a ticket (you’ll need cash), and give the ticket to the bus driver.
This shuttle bus takes you from Seymour Airport to the ferry crossing (the ride is about 5 minutes).
Staff will load your luggage onto the bus and transfer it directly to the ferry. Buses run frequently and are timed with arriving flights, so the process is quick and efficient.
Step 2: Ferry to Santa Cruz Island ($1 USD)
The ferry connects Baltra Island to Santa Cruz Island and takes only a few minutes.
At the dock, staff will unload your luggage from the bus and onto the small ferry.
Once you’re on the boat, you’ll need to pay the operator $1 USD in cash.
Step 3: To Puerto Ayora (Taxi or Bus)
Once you arrive on Santa Cruz Island, you’ll collect your luggage and choose between two transportation options to reach Puerto Ayora: taxi or bus.
At the dock, you’ll see staff and drivers directing arriving passengers toward either the public bus or taxis.
Option 1: Direct Taxi (Most Convenient)
You can take a direct taxi from the Santa Cruz dock straight to your accommodation in Puerto Ayora. It was about $35 USD when I was there in 2025.
Option 2: Public Bus (Cheapest Option)
You can also take the public bus to the Puerto Ayora bus terminal ($5 USD).
The buses generally depart once enough passengers have boarded rather than on a fixed schedule. In my experience, the wait was only about 5–10 minutes.
If you choose the bus, staff will point you to the one heading to Puerto Ayora. You simply load your luggage and pay the driver in cash.
The bus ride takes around 45 minutes and drops passengers off at the main bus terminal in Puerto Ayora. From there, you can either walk to your accommodation or take a local taxi, which costs $2 USD for a ride anywhere within town. There are taxis (white Toyota pickup trucks) waiting at the bus terminal.
Accommodations in Puerto Ayora
There are plenty of accommodation options in Puerto Ayora, ranging from budget hostels and family-run guesthouses to luxury stays. I was honestly surprised by how many choices there were.
I ended up staying at a simple, clean, and affordable guesthouse run by a husband-and-wife team.
Booking Day Tours & Activities in the Galápagos
There are lots of things you can do independently in the Galápagos. However, to visit uninhabited islands or to snorkel and dive at protected marine sites, you’ll need a licensed guide for conservation reasons. A lot of these experiences are only possible as part of an organized day tour.
You don’t need to book the day tours before you arrive. Once you’re in Puerto Ayora or San Cristóbal, there are lots of local tour agencies where you can book day trips in person.
I booked all of my tours after arriving, and I was able to get spots for everything I wanted. Some tours weren’t available on my exact preferred dates, but I made it work.
If you want the certainty of fixed dates, you can book ahead. You can contact a local Galápagos tour agency via email or WhatsApp to reserve a spot.
You can also book day tours through Viator and GetYourGuide. Many local tour operators accept reservations through these platforms, allowing you to compare a range of options from different providers.
However, not all operators list their tours online, so you may find additional options by booking in person after you arrive.
Tours you can book online include:
Note: If you’re booking day tours in-person, most tour agencies strongly prefer—or only accept—cash payments. If you don’t want the hassle of paying for tours in cash, then booking online may be more convenient. (I had to look for an ATM in town before being able to book a tour I wanted because the agency I used wouldn’t accept credit cards.)
Cost of Day Tours
I did two full-day tours:
- A snorkeling tour to Los Túneles
- A wildlife tour on the uninhabited North Seymour Island
I saw some incredible wildlife and landscapes on these tours.


Each tour costs about $200–250 USD. Pricing also depends on boat amenities — there were more luxury options that start at $300 USD per tour.
Both tours included boat transportation to the snorkeling site or uninhabited island, lunch, and a licensed guide. Tips for the crew and guides weren’t included. The groups were small, around 12–16 people per tour.
Things I Did Independently Without a Tour
Even though a lot of the Galápagos is protected and requires a guide, there are still plenty of places you can explore on your own on the inhabited islands.
On Santa Cruz, I went to:
- Charles Darwin Research Station
- Tortuga Bay (you can snorkel at Playa Mansa on your own—just bring or rent gear)
- Lava tunnels near Puerto Ayora
On Isabela, I visited:
- Flamingo Lagoon
- Concha de Perla (you can snorkel here on your own)
One of my favorite things to do in Puerto Ayora was stroll along the waterfront.
Along the docks you’ll see marine iguanas piled up sunbathing, sea lions sprawled across benches and sidewalks, bright red crabs scattered along the rocks, and pelicans diving right off the pier. I even saw sea turtles swimming near the harbor. In the evenings, you can see fish and small reef sharks.
Even without tours, just wandering around felt like a full wildlife experience.
Island Hopping in the Galápagos
You can travel independently between the four inhabited islands via ferries:
- Santa Cruz
- San Cristóbal
- Isabela
- Floreana
Not all inhabited islands are directly connected by ferries. Santa Cruz is the main hub and is the only island connected to all of the other inhabited islands by direct passenger ferry.
Taking the Ferry Between Islands
You can book ferry tickets through local tour agencies or at the port after you arrive. I booked my ferry ticket at the same time as I booked my snorkeling tour through the same agency.
There are typically two daily departure times: around 7am and 3pm. Each ferry ride takes about 2 to 2.5 hours one way, and costs roughly $30–40 USD per ride.
Because of conservation rules, the larger ferries don’t dock directly at the pier. Instead, you’ll take a small water taxi to get between the shore and the ferry.
On departure day, the process looks like this:
- Check in at the dock — staff will direct you to line up for the water taxi
- Take a small water taxi to the ferry ($1 USD cash)
- Board the main ferry
- Take another small water taxi from the ferry to the destination dock ($1 USD cash)
When I arrived in Isabela, there was also a $10 USD island entry tax. The other islands don’t have this tax.
The ocean can be rough at times, so if you’re prone to motion sickness, it’s worth bringing medication. I was told that morning ferries tend to be slightly calmer than afternoon departures.
Helpful Notes for Independent Travel in the Galápagos
A few practical things that are helpful to know before going:
- You are required to stay at least 2 meters (6 feet) away from wildlife to protect the animals. If the animals get close to you on their own, you should move away.
- Tap water is not potable.
- Toilet paper cannot be flushed (it can clog the pipes). There is usually a small bin next to the toilet for this.
- Depending on the season, the water temperature can be colder than expected. You can rent a wetsuit from your tour operator to keep warm when you’re snorkeling. (I went in November and I was definitely glad to have a wetsuit.)
Transportation
There aren’t rental car options for visitors, so you’ll need to rely on walking, bicycling, or local taxis.
The towns are pretty compact and walkable. You can also take local taxis (they’re all white Toyota pickup trucks). A ride within town typically costs around $2 USD, and trips outside town are about $5 USD (as of 2025).
Bring USD Cash
You’ll want to bring USD cash. USD is used throughout the Galápagos, and cash is strongly preferred everywhere.
There are ATMs on the inhabited islands, but there are daily withdrawal limits. If you’re planning to book multiple day tours, it’s a good idea to bring enough cash with you so you’re not relying on the ATMs too much. (I ended up using the ATM on multiple days to pay for tours because of the withdrawal limit.)
Sun Safety
Definitely pack sunscreen. If possible, choose a reef-safe sunscreen, especially if you’ll be swimming or snorkeling to help protect the marine environment.
Mineral sunscreens made with zinc oxide or titanium dioxide are generally considered the safest option for coral reefs and marine life.
Try to avoid sunscreens containing ingredients like oxybenzone, octinoxate, or octocrylene — they have been linked to coral reef damage. It’s also best to avoid spray sunscreens, since the particles can disperse into the air and ocean and harm the environment.
You can buy sunscreen on the islands, but it’s a lot more expensive.
Don’t underestimate the sun here — the Galápagos sits right on the equator, so the UV index is intense even on cloudy days. It’s super easy to get burned, especially out on the water. Reapply sunscreen often and consider bringing a hat and sun-protective clothing. I saw plenty of sunburned tourists during my trip — one person even burned the tops of their feet so badly that it was painful for them to walk.
Mobile Data
When I was at Guayaquil airport, I bought a physical SIM card that had coverage for the Galápagos at a kiosk.
The SIM card and data plan cost me around $35 USD. It worked fine overall, but coverage was spotty at times.
I didn’t use an eSIM on the islands, so I can’t speak to how well that option works there.
If you prefer the convenience of an eSIM, I recommend checking coverage reviews for the Galápagos before relying on it. One option is Airalo, which is an eSIM provider I’ve enjoyed using in other countries, but I haven’t used it specifically in the Galápagos.
Final Thoughts: Is It Possible to Visit the Galápagos Without a Cruise?
Yes — absolutely. And honestly, it was much easier than I had expected.
Before going, the logistics sounded complicated and a bit intimidating, but once I arrived, everything felt surprisingly straightforward.
Hopefully this guide shows you that independent travel in the Galápagos is far more doable than it might seem.
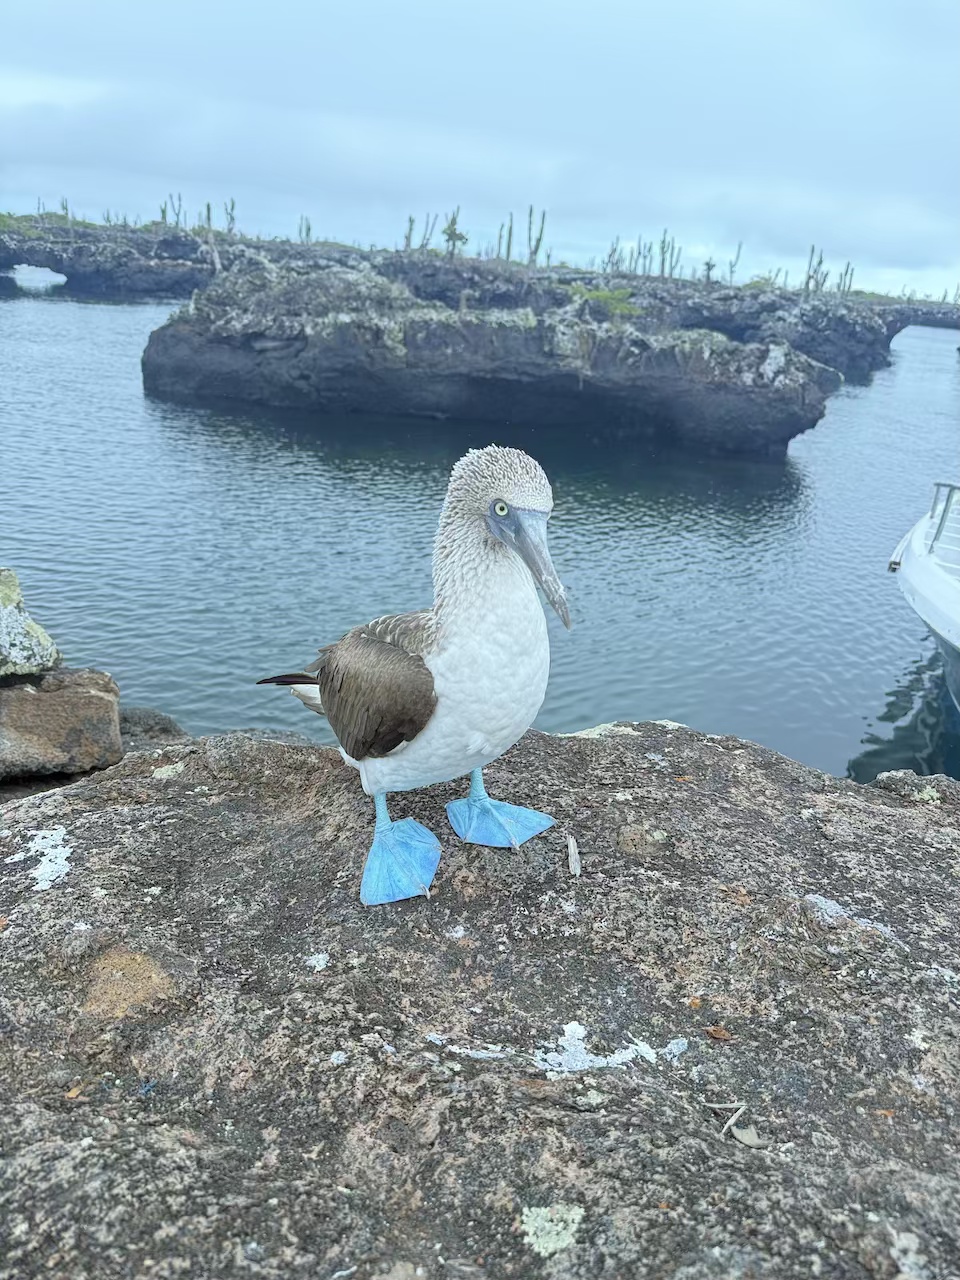
One thing I didn’t get to see, though, was a red-footed booby. The best chance to see them is on Genovesa Island, which is too remote for day tours and typically requires a cruise that includes it. You can sometimes spot them on San Cristóbal around Punta Pitt, but it’s not guaranteed.
Even without a cruise, you’ll still see an incredible variety of wildlife, especially if you join a few day tours to uninhabited islands and other wildlife-rich marine sites.


